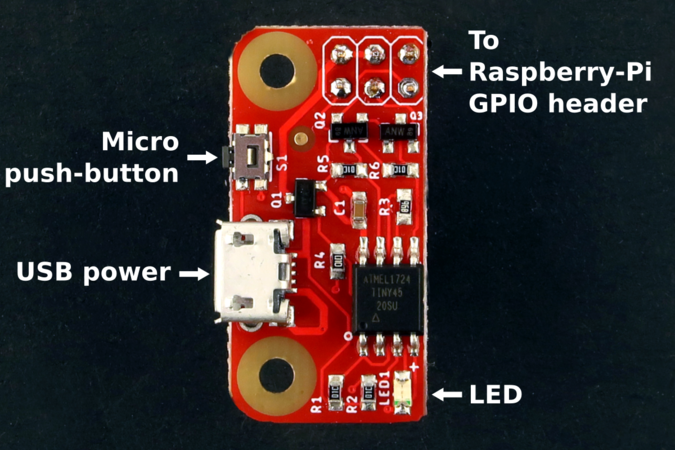
The PiWatcher is a very small and simple device. Because of its simplicity, it's not always easy to "debug" issues you may face in a particular setup. This little guide aims to provide guidance to test your PiWatcher setup.
This guide assumes that the PiWatcher software has been downloaded on the Raspberry-Pi and that I2C has been enabled on the Raspberry-Pi, as detailed in the PiWatcher documentation.
1. If possible, always test the PiWatcher in a headless setup first.
In a headless setup, the Raspberry-Pi is not connected to a screen (HDMI) or a keyboard (USB). The only thing that the Raspberry-Pi should be connected to is a network, either through Ethernet or WiFi. You connect to the Raspberry-Pi remotely from another computer using SSH.
Testing with a headless setup allows ruling out issues related to peripherals. In some rare cases, peripherals connected to the Raspberry-Pi may cause the PiWatcher not to function as expected. For example, HDMI screens typically have their own power supply, and we are aware of at least one case of an HDMI display that leaked current to the Raspberry-Pi, preventing the PiWatcher to effectively fully shut down the Raspberry-Pi.
Once you have successfully tested the PiWatcher in a headless setup, you can then plug peripherals in the Raspberry-Pi to check that things still work as expected.
Note: The version of the PiWatcher sold since January 2020 is much less sensitive to this type of issue.
2. The simple button test.
The PiWatcher should be plugged on the Raspberry-Pi and the USB power source should be plugged to the PiWatcher. No USB power source should be plugged into the PWR connector of the Raspberry-Pi.
Connect to the Raspberry-Pi and type the command piwatcher status. Check that the response is:
OK 0x00
If the PiWatcher is not connected correctly or if I2C is not enabled, you will get an error like this:
Failed to read i2c block from register 0x00
ERR
In that case, check that you have enabled I2C and connected the PiWtacher correctly as indicated in our as detailed in the PiWatcher documentation.
If all is OK, now briefly press the side-button on the PiWatcher, and then type the command piwatcher status again. Check that the response is:
OK 0x80 button_pressed
If you don't get this response, this might indicate that the button is damaged or defective.
3. The shutdown test.
With the same setup as in 2, connect to the Raspberry-Pi and type the following single line:
piwatcher watch 20; sudo halt
The Raspberry-Pi should immediately start shutting down. If you are connected remotely, as recommended in step 1, your SSH connection will freeze and will eventually time out. Remote connections to the Raspberry-Pi will be unavailable at this stage.
Twenty seconds after typing the command above, the Raspberry-Pi will lose all power supplied and will look fully turned off. In most Pi models, this means that all LEDs on the board are off.
At this point, the LED on the PiWatcher will stop being fully on and should instead blink briefly once very 2 seconds approximately.
Next, briefly press the side-button on the PiWatcher. This should start the Raspberry-Pi again: various LEDs on the Raspberry-Pi will start indicating activity again.
After a few seconds, it will be possible to connect to the Raspberry-Pi again (e.g. through SSH).
This confirms that the Raspberry-Pi did a full shutdown and restarts on a button press.
4. The wakeup test.
With the same setup as in 2, connect to the Raspberry-Pi and type the following two lines:
piwatcher wake 40
piwatcher watch 20; sudo halt
As in step 3, the PiWatcher will shut down fully after 20 seconds. In most Pi models, this means that all LEDs on the board are off.
The LED on the PiWatcher will stop being fully on and should instead blink briefly once every 2 seconds approximately.
About forty seconds after the above commands have been typed, the Raspberry-Pi should start up again without any need to press a button. Various LEDs on the Raspberry-Pi will start indicating activity again, and it should be possible to connect to the Raspberry-Pi again through the network.
This confirms that the Raspberry-Pi did a full shutdown and restarts automatically.
The following video summarizes the steps above.
If you contact our support with an issue related to the PiWtacher, please describe which step above failed.
